How to Log Into Windows Using Microsoft Entra ID
Introduction
Logging into Windows using Entra ID is a straightforward process that enhances security while providing seamless access to Windows devices and services. This article will guide you through the steps needed to log into Windows using Entra ID.
What is Entra ID?
Microsoft Entra ID is a cloud-based identity management service that allows organizations to manage users, devices, applications, and other resources centrally. Entra ID supports authentication for a variety of services, including Microsoft 365 and Windows, as well as third-party applications.
The key benefits of Entra ID include:
- Simplified Access: By using Entra ID to log into Windows, you eliminate the need for managing separate local usernames and passwords.
- Enhanced Security: With features like Multi-Factor Authentication and Conditional Access, your device login becomes significantly more secure.
- Streamlined Management: IT administrators can manage device access, policies, and users centrally through the Entra ID portal.
- Unified Authentication: Entra ID enables seamless access to cloud services and apps, all with one set of credentials.
Prerequisites
Before you can log into Windows using Entra ID, there are a few prerequisites that need to be met:
- Windows 10 Pro or later.
- Administrative rights on the computer.
- An active Entra ID.
- An active internet connection.
Join device to Entra ID
Before you can log into Windows using Entra ID, your device must be registered with your Entra ID. This can either be done during the Windows setup process or after you’ve set up the machine.
Below are the steps required to join your device to Entra ID after Windows setup.
-
Click on the Start menu, then select Settings.
-
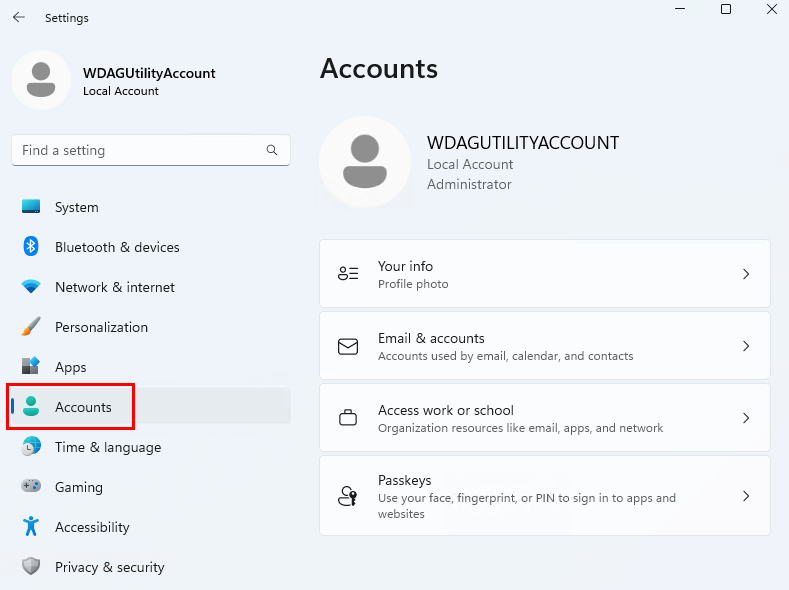
In the Settings window, select Accounts.
-
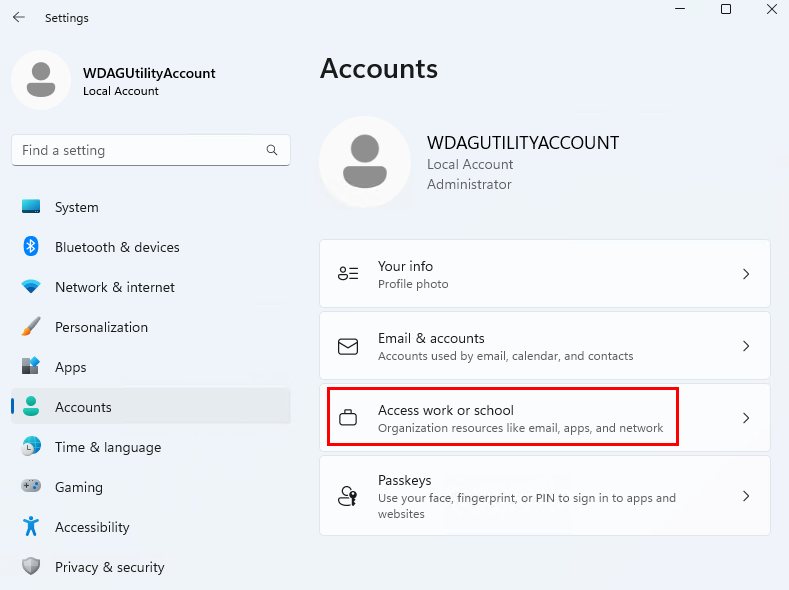
Under the Accounts section, click Access Work or School.
-
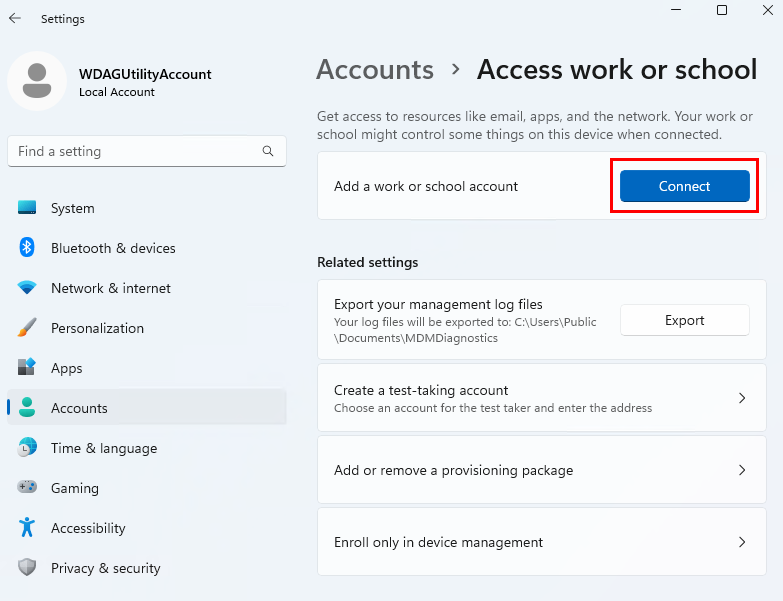
If you have any work address listed here, disconnect it and restart the computer. Come back to this page, click on Connect.
-
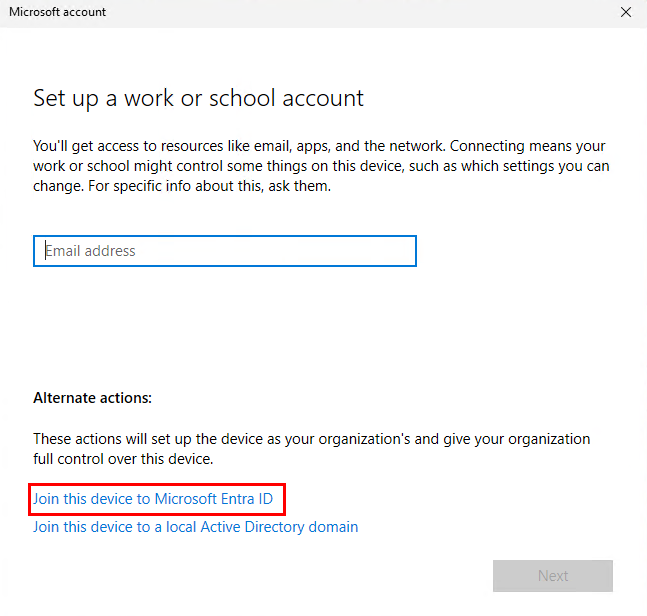
Don’t sign into your work email yet. Instead, click on “Join this device to Microsoft Entra ID”.
-
Follow the on-screen instructions to complete the setup process.
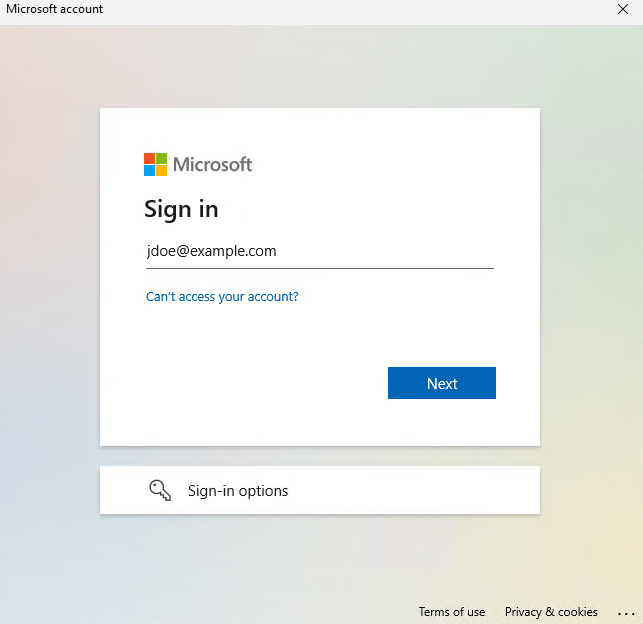
Once your device is successfully joined to Entra ID, you are ready to use it for login purposes.
From the Windows login screen click Other User and then enter your Entra ID credentials using the format jdoe@example.com.
Adding Entra ID to local groups
To add an Entra ID account to the local groups on a Windows machine, you can use either PowerShell or the net command, as shown below:
Option 1: PowerShell
Add-LocalGroupMember -Group "Administrators" -Member "AzureAD\JohnDoe"
Option 2: Command Prompt
net localgroup Administrators AzureAD\JohnDoe /add
Note: This is the user’s display name, which you can find by checking the %USERNAME% environment variable.
Remote Desktop Access
If you need to access the computer using RDP; first add the Entra ID account to the Remote Desktop Users group, then use the following format for username in the Remote Desktop Client:
AzureAD\jdoe@example.com
Conclusion
Logging into Windows using Entra ID is an efficient, secure, and scalable solution for businesses and individuals who want to centralize their identity management. By following the steps outlined in this article, you’ll be able to easily log into your Windows device with your Entra ID credentials and take advantage of features like Single Sign-On, MFA, and more.
References
[1] What is Microsoft Entra ID?
[2] How to manage the local administrators group on Microsoft Entra joined devices
[3] Adding a work account and login to a personal computer running Windows 10 Home
[4] How do I add Azure Active Directory User to Local Administrators Group