How to setup Eclipse for C++ development on Windows
Introduction
Eclipse IDE is a free and open-source integrated development environment. It is primarily used for Java programming, but it also supports other languages like C, C++, Python, and more [1]. To setup Eclipse for C++ development, we need to install the necessary tools and plugins first. This article is a step-by-step guide to setting up Eclipse for C++ development on Windows.
Setup the C++ compiler
First, we need to install a C++ compiler for Eclipse to use. GCC (GNU Compiler Collection) is a collection of free and open source compilers from the GNU project [2].
MinGW-w64 is a version of GCC that is compatible with Microsoft Windows [3]. You can download the latest standalone build from WinLibs.com here.
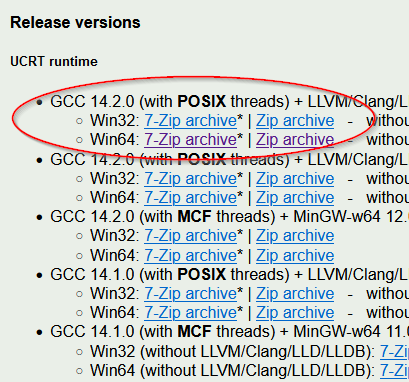
Extract the mingw64 folder to your system drive.
It contains a bin folder which holds development related binaries.
Set PATH environment variables
We need to add the location of the above folder to the system PATH variable. The system PATH variable is an environment variable that specifies a set of directories where executable programs are located, allowing the operating system to find and run these programs.
Open a Command Prompt and run start sysdm.cpl to launch System Properties.
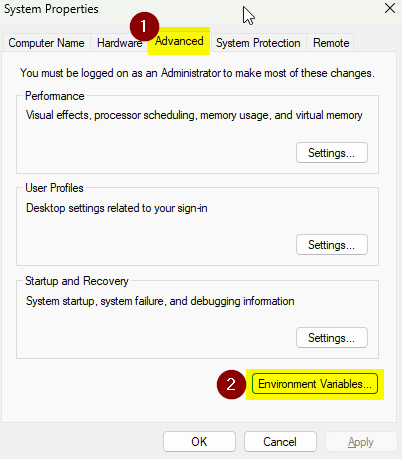
Click on the Advanced tab and then click on the Environment Variables button.
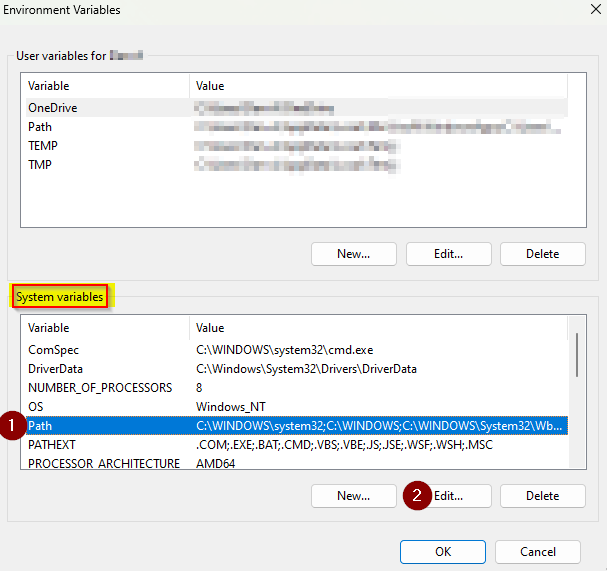
Edit the system PATH variable and add the location of your mingw64\bin folder.
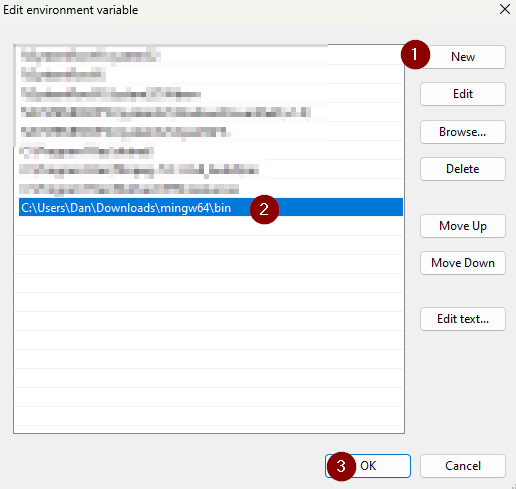
Restart your computer for the changes to take effect.
Setup Eclipse
Download Eclipse IDE for C/C++ Developers from here.
Launch Eclipse and setup a new workspace.
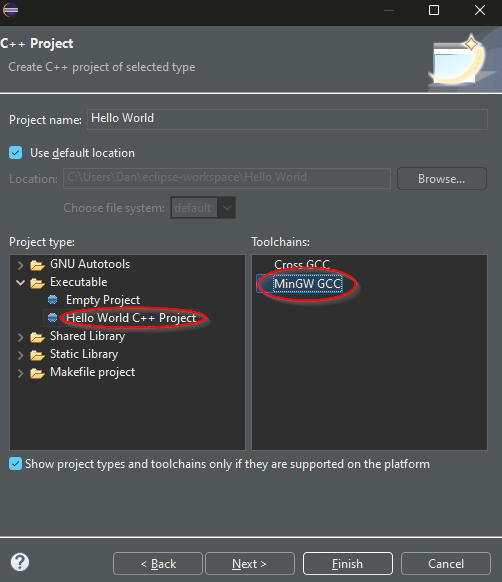
Create a new Hello World project as follows:
- File → New C/C++ Project
- C++ Managed Build
- Project type → Executable → Hello World
- ToolChains → MinGW GCC
- All other settings default
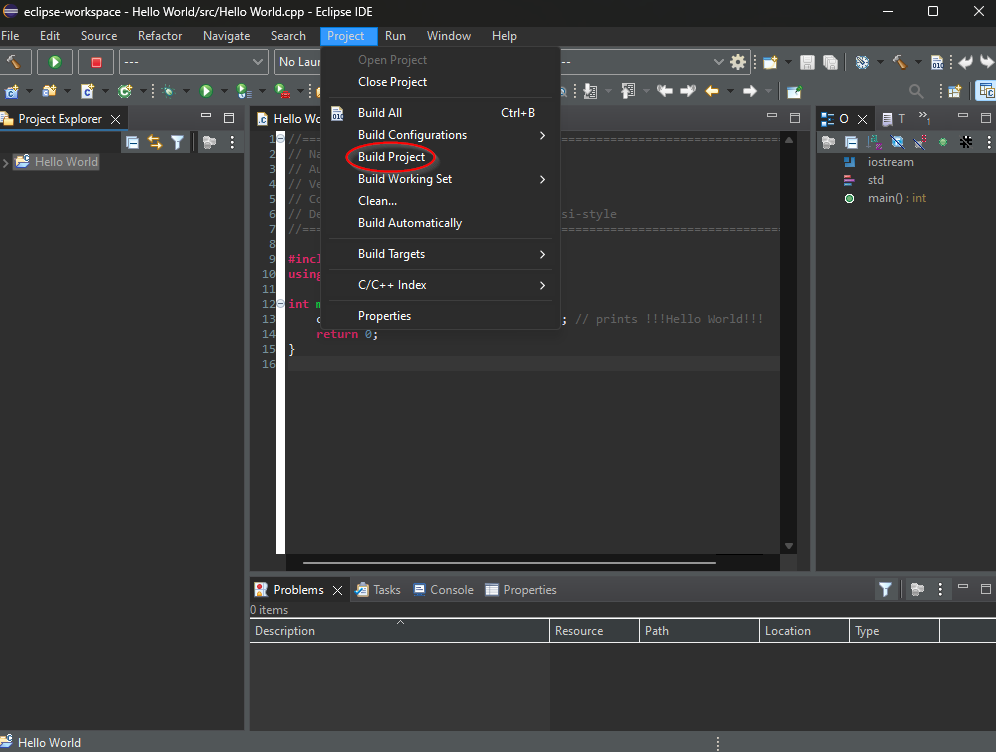
Now build and run the project…
From the Project menu, select Build Project.
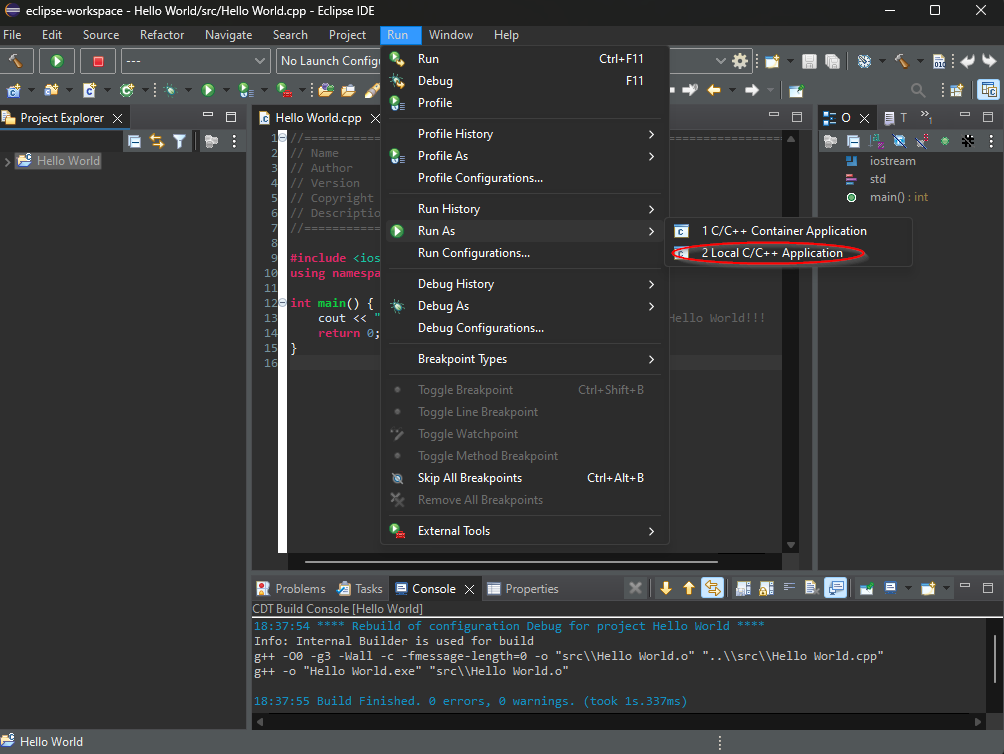
From the Run menu, select Run As → 2 Local C/C++ Application.
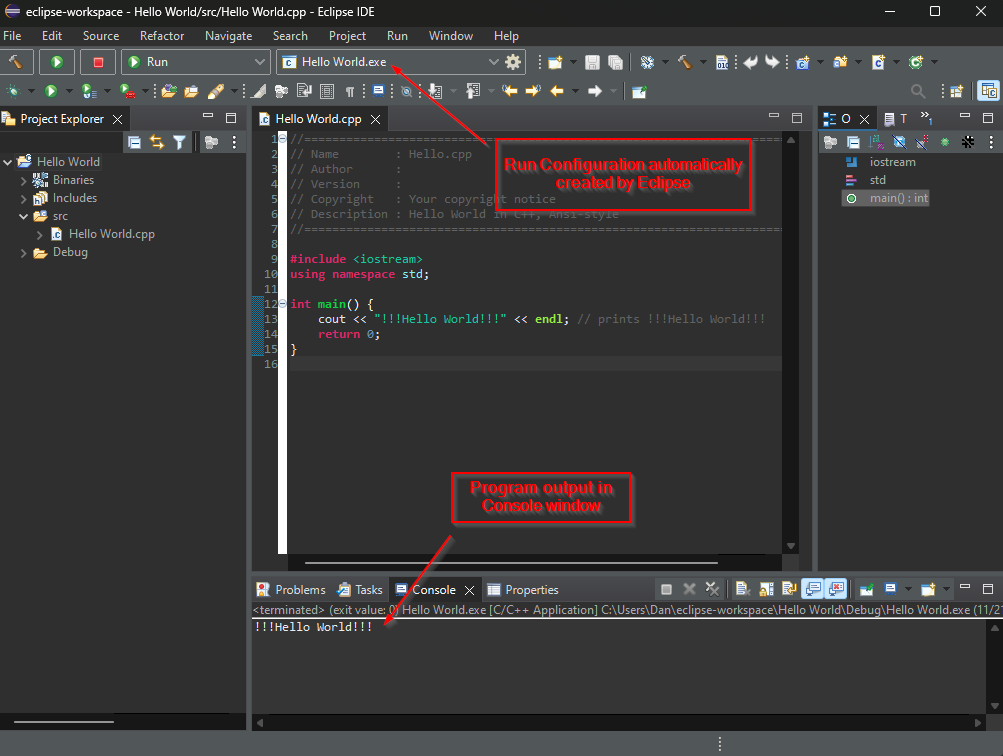
The first time we run the application, Eclipse sets up a Run Configuration for the project so that we can simply click Run or (CTRL + F11) to launch the application in future. The output of the Hello World program is shown in the Console window at the bottom of the Eclipse IDE.
CDT Plugin
If you downloaded the C++ version of Eclipse, the C/C++ Development Tools (CDT) plugin should already be included. If you need to install CDT manually you can go to Help > Eclipse Marketplace, search for CDT and install it [4].
Conclusion
With a little configuration, Eclipse proved to be a usable C++ development environment on Windows. The IDE provides support for C++ via the Marketplace and CDT plugin [4]. However, we must provide a C++ compiler for Eclipse to use. The process of setting up the compiler was greatly simplified thanks to the work of the MinGW-w64 and WinLibs.com projects [2, 3]. Once the compiler was sucessfully installed, we were able to build and run C++ projects in Eclipse on Windows.